Installing StatPro
(for PCs with Microsoft Office 2010)
This page will walk you through installing StatPro, either on your own PC or for use on the Booth lab machines. This procedure requires you have WinZip installed. WinZip is already available on all Booth lab machines. If you don’t have it on your own PC, you can download an evaluation copy here.
The screenshots below are from my office PC running Windows 7 and Microsoft Office 2010.
The only differences with the lab PCs are, first, you will need to save the StatPro files to a portable USB drive in Steps 1 and 3, and second, you will need to repeat steps 4 – 9 each time you want to use StatPro on a lab machine. Don’t worry, once you do it the first time it’s very simple.
- Click here to download the file StatPro.zip (in most browsers, right-click on the link and choose “Save As...”.If you’re on your own PC, save the file somewhere convenient such as the desktop or My Documents.If you’re on a lab PC you will probably need to save it to a portable USB drive (typically F:).
- Open StatPro.zip using WinZip.You’ll see the box below.Click on “1-Click Unzip”.This extracts all the StatPro files to a folder called “StatPro” located in the same place you saved StatPro.zip in Step 1).

- Open up Excel 2010.Click on the green “File” tab (1) on the upper left and click on “Options” (2) on the left side of the window.A new window titled “Excel Options” will open.Choose “Add-Ins” (3) from the left side of this window and click on “Go” (4).That’s four mouse clicks, in case you’re counting J


- A dialog box like the one below pops up, except StatPro will usually not appear under “Add-Ins available”. Click on “Browse…”.

- Navigate to whatever folder you saved “Statpro.zip” to in Step 1 (below I saved StatPro.zip to the desktop).Double click the StatPro folder to open it.Scroll down and click on the file “StatPro.xla” then click “OK”.


NOTE: StatPro needs ALL the .xla files included in StatPro.zip to function, not just StatPro.xla. Be sure the StatPro folder contains lots of .xla files as shown above.
NOTE #2: If you are doing this on a lab PC, you may get a popup asking you whether you want to “copy StatPro.xla to lab folder” or some such. Click “No”.
- The same dialog box from Step 4 should appear, except this time with StatPro listed among the add-ins and checked.Click “OK”.

StatPro should now be installed!
You should now be able to find StatPro and all its functions under the “Add-Ins” tab at the top of the screen, as shown below. (The drop-down menu shows up when you click on “StatPro”.)

If you want to check that StatPro is installed correctly, open the file mutualFundReturns.xls. Click StatPro -> Summary Stats -> Correlations, Covariances…
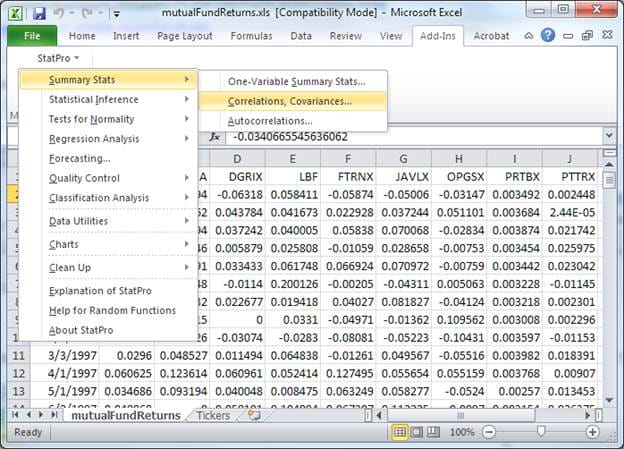
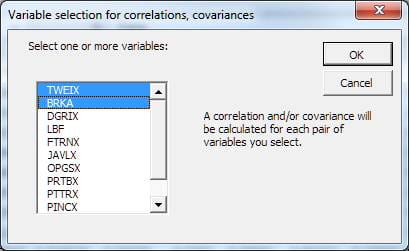
Click “OK” in the box that pops up, then hold down Ctrl and choose any two of the funds (I picked the first two). Two more dialog boxes will pop up, just hit “OK” twice.br/>

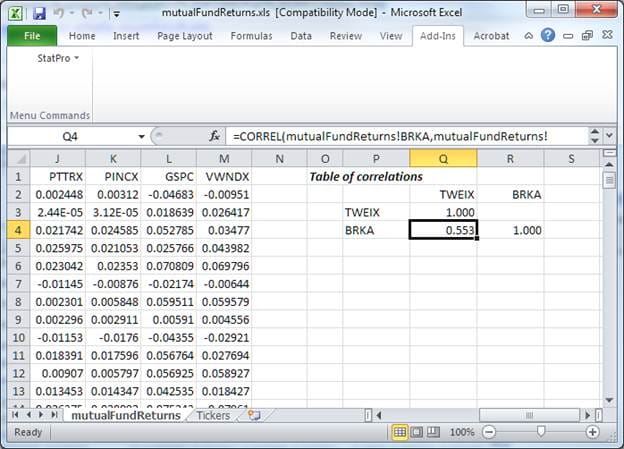
If StatPro is installed correctly, you should see the following table, which tells you that the sample correlation between the TWEIX and BRKA returns is 0.553.